Tuesday, August 30, 2011

Central Park Snuggle

We are on a roll here at the Reiner Casa!
Remember this fat quarter bundle???
Seriously, this makes the whole project sooo easy!

I knew the measurements of each fat quarter were 18"x22". To be the most efficient and least wasteful I used an 8"x8" omnigrid to cut my squares.

A little Iron. A little Grid. Ba-da-boom! Ba-da-bing! 
I layered 4-5 quarters so that when I cut out the square I received a bunch of squares complete! 
Please forgive the HORRID pics...cell phone camera! I promise to start using my real camera!!!
Anyway, here are all the squares cut out! I cut two of each pattern. The ironing and cutting took me about 30-40 minutes...not long at all. 
I laid out my oilcloth fabric that I use as a a dining room table protector. Then I laid each fabric pattern squares out and assembled until I achieved the look I was going for.
Once I decided the layout I numbered my columns again.

Hopefully I picked out the right fabric and layout for his Central Park lovely's new home. 

fingers crossed
xoxo
fler

Monday, August 29, 2011

Tweet!! Tweet!!!

Remember the fabric above from THIS POST HERE !?!? 
Oh how I love THE LITTLE FABRIC SHOP !
Well....

I snagged up this FAB--UUU--LOUS tool from Joann's a'la 50% coupon! Holla!
Ok, mine is 9.5" X 9.5" square and not 5 but couldn't find the right Omnigrip cutting tool. 
I ironed all my fabric and then folded it up so that when I laid my Omnigrip on the yard of fabric I could cut FOUR squares with one rotary cut....WHA!! WHA!!  I love that rotary cutter!
I cut a total of 8 squares per fabric pattern yard.
I then took all my squares and laid them out in the pattern I liked. SPECIAL NOTE: The birdie fabric is all turned one direction. The Damask is even turned the same direction.  Remember my GENIUS AUNT DRINDA WHO IS THE QUILTING FASHIONISTA??? 
Well, she said to turn the tweets in various directions. My first thought was, "This goes against my perfect order sensibilities.....", BUT I know she knows what she is talking about.

Sooooooo.......
I moved the tweets and damask all different directions AND TOTALLY LOVE IT!!! Way better! Really creates interest. NOTE TO SELF: Listen to Aunt Drin!

To remember each row I stacked them by column. There are 5 columns and then each layer across 1-5 is my row. Keeps my easily distracted mind in order! LOL
I sewed each row and then labeled each row with a small piece of paper and straight pin. 
Then I sew row one to row two; row three to row four; row five to row six, etc. 

I then had four blocks of two rows each. I then sewed block one to block two AND YOU GET THE POINT. This made putting the quilt together easier until I had ONE full quilt top!
Here's Tweet (at least the top half of her!) all stitched together!
Now what do I do?!?!? I'll be going to my Joann's quilting class this coming Thursday to figure it out! Can't wait!!!
oh happy day!

xoxo
fler

Wednesday, August 24, 2011

Digs for the Littles

There are all kinds of preggos at work these days!
Lots of cute baby showers to celebrate the arrival of all the littles.

I have been having fun pick out fabrics and designs for all the tots.

One set of twin girls.
One boy. 
One girl.
For the sweet twin girls, a little birdy told me momma was doing a safari theme. Perfect! So I made a burp cloth and used it as my packaging.
Inside the burp cloth were two onesies. You might recognize the bedazzled elephant because I used this design before. The jeweled onesie has grey ruffles on the bum. The second onesie I used my dark colored heat transfer material. I selected my graphic and filled in the colors and positioned as I wanted. I printed the graphic to the heat transfer material, little miss Silhouette cut out my design, a little iron press and VOILA!
SEW CUTE!!!!

For the little boy I selected a space design and filled in the colors as I wanted. I did all the same steps above as the baby birdie on the branch and VOILA...I'm in L-O-V-E!!!
Had to make a boy burp cloth too. Just wouldn't be right if I skipped this. Love the fun dino's!
On the inside of the burp cloth it's oooh---so soft!

Finally....another little girl.
Cute burp cloth...love this fabric!
I love my mommy and daddy! Ahhh...so sweet and soft.
And a Blingin Chick-a-dee!
I love how the light is shining! 
And of course....a ruffled bum!

Happy Baby Showering to us at work!
I hope they all like their new Threads of Fler digs for their littles!

xoxo
fler

Tuesday, August 23, 2011

Q-Q-Q-Quilt


My Aunt Drinda recently sent me this fun book. 

She is the Quilting Queen...in my humble opinion.
She makes UUUBER fancy quilts!!!

As I finish each project I want to challenge myself with something new. 

Recently at the Women of Faith conference my friend Kera brought her quilt. It too was AMAZING!!!
Between my Aunt Drin and Kera, I have been inspired!

This time we're going for a q-u-i-l-t!

 I headed over to one of my FAV fabric stores:

And snagged up some DELIGHTFUL FAB fabric!

Quilt # 1 Color Scheme: Yellow, Grey, Black and White
DIVINE!
Then I picked up this 18x22 fat quarter bundle (40 ct) affectionately named: Central Park Collection
HEAVENLY CHEERFUL! 

What's even more fabulous is that JoAnn Fabrics offers free quilting classes every Thursday evening in their Viking shop!!! 

P.S. I double checked to make sure they wouldn't be annoyed with a newbie like me...HAHA!

Quilting 101 Underway!

xoxo
fler

Wednesday, August 17, 2011

Scrubby Scrubby in the Sink!

A few of us went up to Women of Faith in Atlanta this year. This is my 2nd annual trip and plan on going as many years as I can. Love it! 
We were some of the first to arrive Friday morning to IMAGINE!
One of my favorite songs right now is "Blessings" by Laura Story. Her and her husband have a beautiful and challenging story where, all the while, they have held fast to Christ and His promises.

Mary Graham said Laura Story lives in the Atlanta area so they invited her to be part of WOF!!! What a surprise for all of us!!! She sounds even better in person! 
We're missing a few lovely ladies but I forgot my camera so all I have is this one pic from when we first arrived Friday morning.
I'm pretty sure my begging may have worked because I think Kera (in the middle) sent me a text last night about it! YAY!!!
Day 1 had so many take-aways from; funny stories, tearful testimonies, practical tools for everyday life, and clear reminders of how much we are loved by an Amazing God. I really cannot explain what it's like to be in the presence of God, women of faith (note: I didn't say Baptist, Methodist, SDA, Lutheran...NOPE....same God and we're all children), family, best friends, and new friends. I just find myself so thankful to share this part of me with others at such an event. Connecting on the most important level. Loved this weekend! 
On Sabbath, my precious friend Kristi (she's wearing blue in the above pic...and if you haven't noticed...she's Kera's twin) came to our room. She had in her tiny hands this hand knitted bundle of blue, yellow, and faint green all neatly tied with blue yarn. 
Flan had made me homemade dishwashing cloths!!! I love them! I opened them up at home and both the hubs and I were afraid to use them. They are JUST SO NICE!!! What if I ruin them? Tear them? Discolor them? I had to double check first. 

Flan gave me clear instructions to use them as normal but when washing, no bleach. This cloths are AMAZING! I love using them when doing dishes. I have even found myself leaving out some dishes from the dishwasher just so I can use them. 

Doing dishes has become SOOOO special to me! 

Thank you Flan first for being my sister in Christ and simply beautiful you! You are perfect to me! Secondly, thank you for such a special and thoughtful gift. I love them!

So who's in next year for WOF???

xoxo
fler

Sunday, August 7, 2011

Lessons from the Romans!

The Roman blinds are finished!
With the help of my hubs...we're done!
Now, I have a lot to share about this project. The finished product is NOT perfect at all, but I learned a lot along the way. 

I'm excited to share what I learned. This has been a project which intimidated me a long time before getting the courage to go for it. 

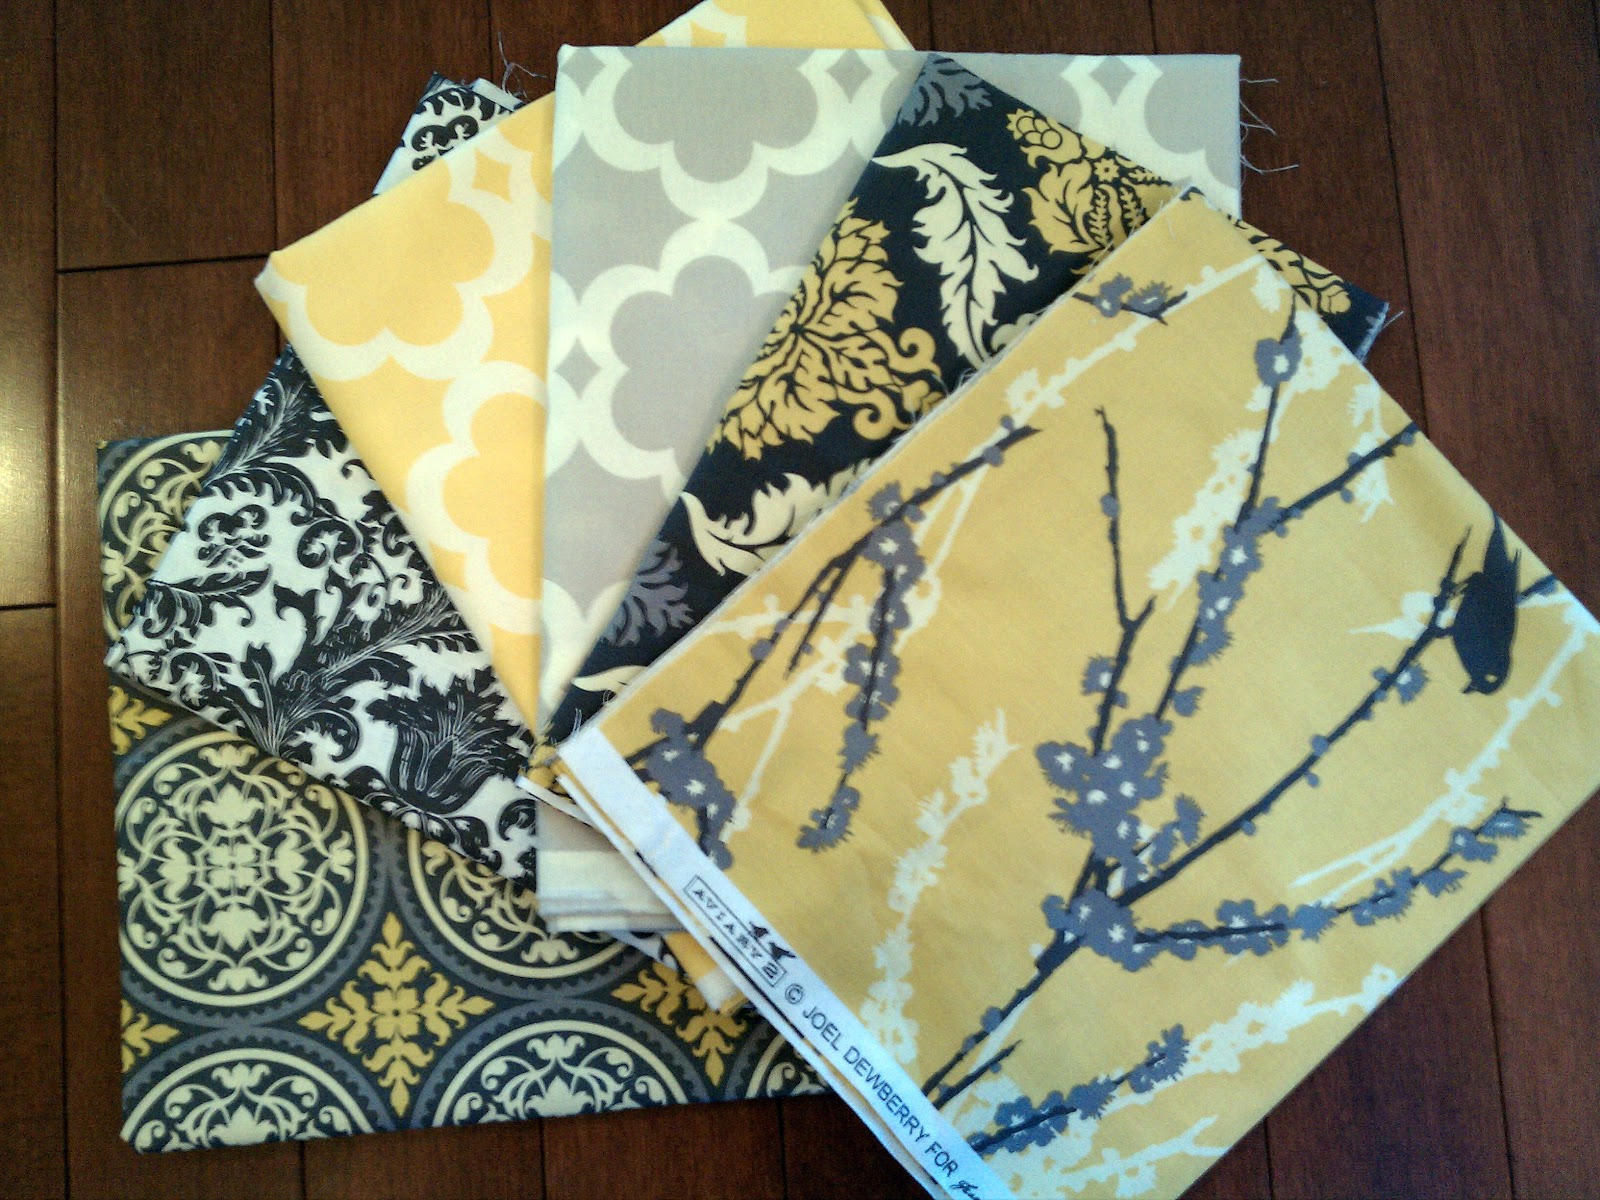
The first thing I did was find a good home decor fabric that would achieve the look I was going for. 
I went to one of my FAV fabric shops:

The next thing I did was RESEARCH, RESEARCH, RESEARCH! I went through all the sewing books I have (thanks family and friends for all the AWESOME books...woot woot!!!)
I finally settled on this tutorial:

Once I purchased all my materials per the tutorial I got crackin!
I really struggled with the length I needed and making sure the ends were perfectly straight. So I used my  green cutting mat, roller cutter and folded the right sides of my decor fabric together. Once I was able to make sure my lines were straight, I used my roller cutter to tidy up the ends so they would be perfectly straight (TOTAL BEGINNER MOVE...I know....hehe).
To make my life easy, I'm sure there's an expert way of doing this and probably easier, but this worked for me; I pinned my decor fabric to my curtain lining fabric right sides together. I used my FAB fabric as the pattern to cut the lining fabric from. EASY PEASY!
Leaving pinned together I stitched just as the tutorial instructed me. Then I turned it inside out which made a casing. 
At this point I was feeling pretty good.
A closer look. 
So still following the tutorial I attached the rings and was getting a little more confidence in the project. I had this idea I could deconstruct the old, VERY DIRTY, levolar blinds and use the parts to mount the blinds to the window frame. Thrifty right?!?!

 EPIC FAIL!!! Don't do this...just be a good seamstress and follow the tutorials!!! haha!

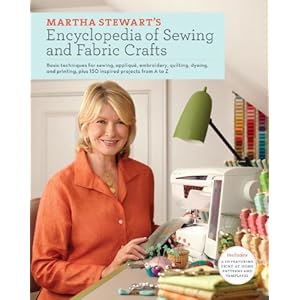
It just so happens later that afternoon we went to a Borders bookstore that is closing near us...BOOOOO HOOOO!!! I am very sad about Borders closing! I love going there and scoping out the next books to read. 
Well, I stumbled across this AWESOME book!
Um....SO FAB!!! Yea, this book has just about it all! LOVE LOVE LOVE!
I found a great section on window treatments and really liked Martha's take on roman blind construction.

So off to Home Depot I went...clueless mind you, but a rough idea from Martha's book!
I picked up some dowels and 2X1 wood plank or whatever you call it. I had my measurements and they cut the wood for me!!! Where I lost the "thrifty" in this project was having to purchase a staple gun and staples!!! Um, $30 extra I wasn't expecting. But hey, every house needs a staple gun I guess. So I can't feel that bad about it.
Ok, so Martha suggests using dowels to add weight at each ring interval...makes perfect sense to create that finished look. I created these small casings for each interval.
I sewed each casing at the measured interval, sewed the rings to hemmed edge of the casings, and inserted the dowels. 
I spray painted the 2X1 with some white gloss paint to take the finished look one step fuRther...THANKS HUBS FOR THE IDEA!

The tutorial did not say to finish the top edge, but I hemmed it anyway. Then I wrapped a little around the top 2x1 wood strip and staple gunned it down! I have never used a staple gun so that was strangely fun...hehe! 
I screwed the special rings through the wood at the top and then threaded the string as the tutorial online and Martha guide.
We painted the windowsill since before the blinds were solid and we couldn't paint in the space before. The hubs got out some power tools...HARUMPH, HARUMPH, HARUMPH!!!
He was a ROCKSTAR and mounted our Roman Blinds to perfection!!!
When we first stepped back the right side was hanging ever so slightly longer...NO PROB...hello Mr. Staple Gun! One ta-dow and we were good to go!
So what are the final imperfections that I'll correct next time around? Maybe slightly longer because I didn't factor in the length it would take to go around the wood at the top for the mounting mechanism. I also don't like the pull things at the bottom...I have an idea for those but have to make a run to a store first...stay tuned!!!

I also would like to see more of a layered look to the roman pleats. The online tutorial explained how to do this, but with the Martha re-do I jumped ship a little from the online tutorial and went with her advice.  Next time, I'm going to go with the online tutorial's advice for the ring spacing. 
Overall, I am beyond excited about the finished product!!! EEEKKKK!!!
It's just a huge sense of accomplishment for me. I never thought it would work out and IT DID!!!
I now know I can do window treatments for the back bedrooms. I don't think I'm good enough yet to make blinds for the main rooms of the house, but with a few back bedroom practice...maybe. 

Fingers crossed!
XOXO
fler

Tuesday, August 2, 2011

While You're Waiting

How is the Roman Blind project going???

Well, for the most part pretty good. I'll post the whole project and lessons learned once it's all done. 
FOREWARNING: It's gonna have a lot of pics! I have learned quite a bit on this project. If it hangs nicely and turns out...I have many other windows that need a little dressing up!

In the meantime,
here is a quick project turned birthday gift!

Remember my Chevron tRe Plate post 


Well my friend Ashley is super FAB and has a fun modern home. Her birthday is July 2 and her wedding anniversary is Memorial Day weekend so I thought I would make her a monogram plate.

I used my Silhouette SD (which is being discontinued because of a new model, BUT is on clearance NOW!!!)

Anyway, used my vinyl cutter with the graphic above. I originally used the actual graphic but it didn't pop on the white plate. Instead, I used the negative space vinyl for the plate graphic. I LOVE how it turned out! Using the negative space pieces was harder because I had to place them free hand. Though not perfect, it worked.

I decided to make the monogram letters bigger this time because I felt like mine were a little too small. I like the larger letters MUCH better!

I hope she likes it! It's kind of a funky addition to a room, but makes a nice unexpected accent.

xoxo Ash!

Stay tuned for the Roman Blind final! Lots of tips coming...of course, ONLY if this isn't a disaster like when I tried to make PJ's: 


XOXO
fler