Sunday, August 7, 2011

Lessons from the Romans!

The Roman blinds are finished!
With the help of my hubs...we're done!
Now, I have a lot to share about this project. The finished product is NOT perfect at all, but I learned a lot along the way. 

I'm excited to share what I learned. This has been a project which intimidated me a long time before getting the courage to go for it. 

The first thing I did was find a good home decor fabric that would achieve the look I was going for. 
I went to one of my FAV fabric shops:

The next thing I did was RESEARCH, RESEARCH, RESEARCH! I went through all the sewing books I have (thanks family and friends for all the AWESOME books...woot woot!!!)
I finally settled on this tutorial:

Once I purchased all my materials per the tutorial I got crackin!
I really struggled with the length I needed and making sure the ends were perfectly straight. So I used my  green cutting mat, roller cutter and folded the right sides of my decor fabric together. Once I was able to make sure my lines were straight, I used my roller cutter to tidy up the ends so they would be perfectly straight (TOTAL BEGINNER MOVE...I know....hehe).
To make my life easy, I'm sure there's an expert way of doing this and probably easier, but this worked for me; I pinned my decor fabric to my curtain lining fabric right sides together. I used my FAB fabric as the pattern to cut the lining fabric from. EASY PEASY!
Leaving pinned together I stitched just as the tutorial instructed me. Then I turned it inside out which made a casing. 
At this point I was feeling pretty good.
A closer look. 
So still following the tutorial I attached the rings and was getting a little more confidence in the project. I had this idea I could deconstruct the old, VERY DIRTY, levolar blinds and use the parts to mount the blinds to the window frame. Thrifty right?!?!

 EPIC FAIL!!! Don't do this...just be a good seamstress and follow the tutorials!!! haha!

It just so happens later that afternoon we went to a Borders bookstore that is closing near us...BOOOOO HOOOO!!! I am very sad about Borders closing! I love going there and scoping out the next books to read. 
Well, I stumbled across this AWESOME book!
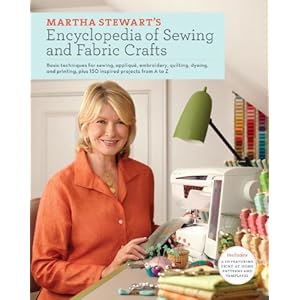
Um....SO FAB!!! Yea, this book has just about it all! LOVE LOVE LOVE!
I found a great section on window treatments and really liked Martha's take on roman blind construction.

So off to Home Depot I went...clueless mind you, but a rough idea from Martha's book!
I picked up some dowels and 2X1 wood plank or whatever you call it. I had my measurements and they cut the wood for me!!! Where I lost the "thrifty" in this project was having to purchase a staple gun and staples!!! Um, $30 extra I wasn't expecting. But hey, every house needs a staple gun I guess. So I can't feel that bad about it.
Ok, so Martha suggests using dowels to add weight at each ring interval...makes perfect sense to create that finished look. I created these small casings for each interval.
I sewed each casing at the measured interval, sewed the rings to hemmed edge of the casings, and inserted the dowels. 
I spray painted the 2X1 with some white gloss paint to take the finished look one step fuRther...THANKS HUBS FOR THE IDEA!

The tutorial did not say to finish the top edge, but I hemmed it anyway. Then I wrapped a little around the top 2x1 wood strip and staple gunned it down! I have never used a staple gun so that was strangely fun...hehe! 
I screwed the special rings through the wood at the top and then threaded the string as the tutorial online and Martha guide.
We painted the windowsill since before the blinds were solid and we couldn't paint in the space before. The hubs got out some power tools...HARUMPH, HARUMPH, HARUMPH!!!
He was a ROCKSTAR and mounted our Roman Blinds to perfection!!!
When we first stepped back the right side was hanging ever so slightly longer...NO PROB...hello Mr. Staple Gun! One ta-dow and we were good to go!
So what are the final imperfections that I'll correct next time around? Maybe slightly longer because I didn't factor in the length it would take to go around the wood at the top for the mounting mechanism. I also don't like the pull things at the bottom...I have an idea for those but have to make a run to a store first...stay tuned!!!

I also would like to see more of a layered look to the roman pleats. The online tutorial explained how to do this, but with the Martha re-do I jumped ship a little from the online tutorial and went with her advice.  Next time, I'm going to go with the online tutorial's advice for the ring spacing. 
Overall, I am beyond excited about the finished product!!! EEEKKKK!!!
It's just a huge sense of accomplishment for me. I never thought it would work out and IT DID!!!
I now know I can do window treatments for the back bedrooms. I don't think I'm good enough yet to make blinds for the main rooms of the house, but with a few back bedroom practice...maybe. 

Fingers crossed!
XOXO
fler

Tuesday, August 2, 2011

While You're Waiting

How is the Roman Blind project going???

Well, for the most part pretty good. I'll post the whole project and lessons learned once it's all done. 
FOREWARNING: It's gonna have a lot of pics! I have learned quite a bit on this project. If it hangs nicely and turns out...I have many other windows that need a little dressing up!

In the meantime,
here is a quick project turned birthday gift!

Remember my Chevron tRe Plate post 


Well my friend Ashley is super FAB and has a fun modern home. Her birthday is July 2 and her wedding anniversary is Memorial Day weekend so I thought I would make her a monogram plate.

I used my Silhouette SD (which is being discontinued because of a new model, BUT is on clearance NOW!!!)

Anyway, used my vinyl cutter with the graphic above. I originally used the actual graphic but it didn't pop on the white plate. Instead, I used the negative space vinyl for the plate graphic. I LOVE how it turned out! Using the negative space pieces was harder because I had to place them free hand. Though not perfect, it worked.

I decided to make the monogram letters bigger this time because I felt like mine were a little too small. I like the larger letters MUCH better!

I hope she likes it! It's kind of a funky addition to a room, but makes a nice unexpected accent.

xoxo Ash!

Stay tuned for the Roman Blind final! Lots of tips coming...of course, ONLY if this isn't a disaster like when I tried to make PJ's: 


& 


XOXO
fler

Monday, August 1, 2011

Stay Tuned

Had a little challenge with the Roman Blind assembly....

Stay Tuned....

Hopefully after a couple errands, we'll have it complete!

xoxo
fler

Monday, July 4, 2011

Babies Need Bling Too!

My cuz just had a little girl and since they didn't know Hadley's gender till she was born, they don't have much "girlie" stuff.

INSERT CUZ'S HELP!

I've been D.Y.I.N.G. to try my new Silhouette Rhinestone kit

My very first project was A BLAST!!!
I grabbed some prewashed plain white onesies and an old grey t-shirt I no longer wear. 
I cut the bottom seam off my t-shirt and then cute 1 inch strips. "Fler, why would you do that?!?!?", you ask. Well, you'll see!
I cut each side seam off. When done I had 4 strips total. 
Next, I found this super cute template in my Silhouette Studio. Perfect baby girlie BLING!!! I used my rhinestone heat transfer kit. I'm not sure how long this will last after washes, but should some fall off...easy fix anyway. 
OH HOW I LOVE HOW THIS TURNED OUT!!! The baby elephant's body color is pink and she has a clear rhinestone eye. SOOOO CUTE!!!

Remember those strips?!?!
Well, set your sewing machine straight stitch to the widest stitch and make some ruffles. The really nice thing about t-shirt material is that it doesn't really fray so you don't have to hem or anything...EASY!!!
Now that you have ruffles, I pinned them to the bum of my baby pink elephant onesie and put my straight stitch back to normal stitch length and sewed the ruffles in place. 
SOOOO CUTE I CAN'T STAND IT!!! 
I wonder if our bub will be a little girl from Ethiopia??? I'm totally making her some of these. 
I couldn't stop there. I had this insanely cute birdie image I've been wanting to use so I figured Hadley needed a cute birdie onesie too!
And of course.......A RUFFLED BUM!
Oh I love it!

Off to the Fed Ex drop box so Little Miss Hadley can have some girlie clothes!

xoxo
fler

Saturday, July 2, 2011

Chevron tRe Plate


I have this kitchen nook where our table is and it has this amazing wall behind it.
 I have been slowing trying to make this space cohesive and fun. It's been difficult because we're about to remodel the whole space so we've completely NOT decorated at all in the kitchen and family room. UGH!!!

But, we did a little decorating where the table is (I'll post pics once we complete the space).

Where did I get the idea for the Chevron Monogrammed plate?


I used my Silouette to make the chevrons and monogram.

The Chevrons were made of Vinyl and the Monogram was made of thick Cardstock.

To seal the chevrons and monogram to the plate I used Mod Podge. It's kinda like Elmers glue but thinner consistency. The sponge brush worked PERFECT for application.
I used a $2 white plate from IKEA. I made sure it was clean before applying the chevrons. I didn't do any fancy measurements and just eyeballed the spacing. I see my imperfections, but once it's done...you don't really notice. 

Apply a thin layer of your Mod Podge just like Taylor Made says. She didn't apply the Mod Podge on rim of plate, but I went ahead and did.

Lay your Monogram on top of the thin layer. I used a toothpick to make sure the letters were placed right and all the way down onto the plate.

Add another layer of Mod Podge on top of the letters. This time I only added the second layer to center of the plate and not on the rims.
NOW...LET MR. FANCY PLATE DRY!!!

Here you have it! A fancy Chevron "TRE" Monogrammed Plate!!! Even the hubs thinks it's cool...SCORE!
Seriously....20 minute project!!! EASY PEASEY!!! 

Once the space is complete, you'll see what I plan to do with this little treasure!

xoxo
fler

Sunday, June 26, 2011

G.I.R.L.

We have a new girl in the family.

I knew I wanted to make something practical, but unique. 

I went to one of my FAV fabric stores: 


I ordered up some organic cotton...aaahhh...sooo soft!

When I received my new fancy organic cotton fabrics, I went to my fabric cupboard. When I'm at Joann's I always scope out their remnants and get fabric CHEEEAAAPPP!!! I have had some pretty flannels and chenilles hanging out in the cupboard waiting to be loved on.

I finally had the perfect project for them!

Burping Cloths!!!
I've seen friends carry these burping cloths and randomly online. Easy enough and SUPER practical!
Organic Cotton
 on one side
Softee 
on the other side!


Oh I am IN L.O.V.E with these prints!!!
OOOHHH so soft light green chenille!!!

A pretty and unique practical baby gift!!!


Who's the baby Girl???

You'll find out later....stay tuned!

xoxo
fler